Certificate Management
Warning
Mideye Server 4 is no longer updated, and new installations are not supported. Only existing Mideye Server 4 installations and upgrades to latest release are supported. Please use Mideye Server 6 for new installations and continued support.
Generate a new self-signed certificate
Mideye is pre-configured with a self-signed certificate for https access to the Web Admin. To generate a new self-signed certificate, execute the following command from the Mideye Server bin-directory:
Note: This command will replace the file /opt/mideyeserver/certificates/webserver_https.keystore and reset the web server configuration. If client certificate validation has been previously enabled, generating a new server certificate will restore the default settings, i.e. viewing Mideye Web Admin will no longer require a client certificate.
The service ‘Apache TomEE’ must be restarted for the changes to take effect.
Optional: replace the self-signed certificate with a custom certificate
Two alternatives for replacing the self-signed certificate are presented below, either using PFX/PKCS12 or using JKS/JCEKS formats.
Alternative 1: Use PFX (PKCS12) format
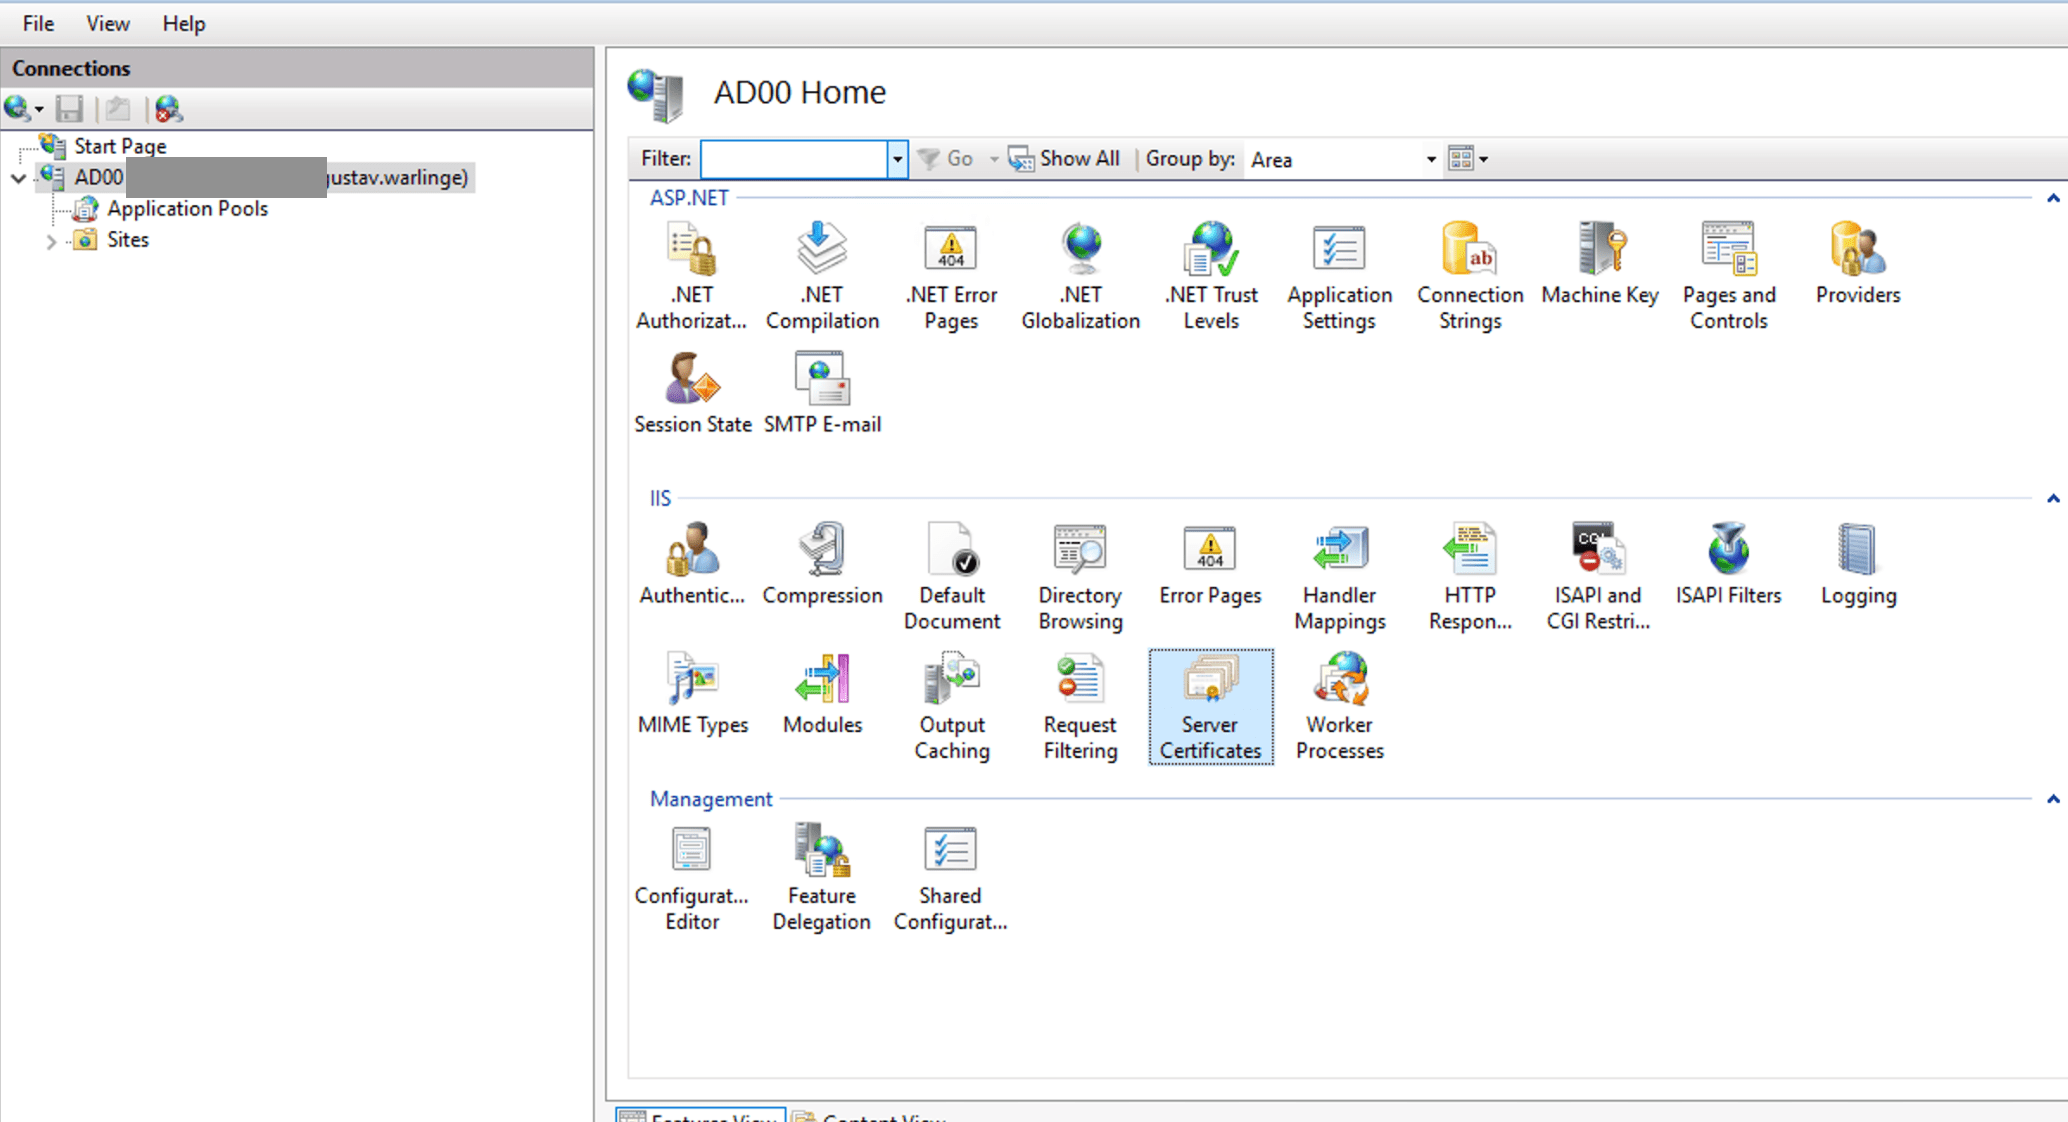
PFX-certificates can easily be generated using IIS on a CA-server. Open Internet Information Service (IIS), navigate to the root and open “Server Certificates”

In the right action bar, click Create Domain Certificate
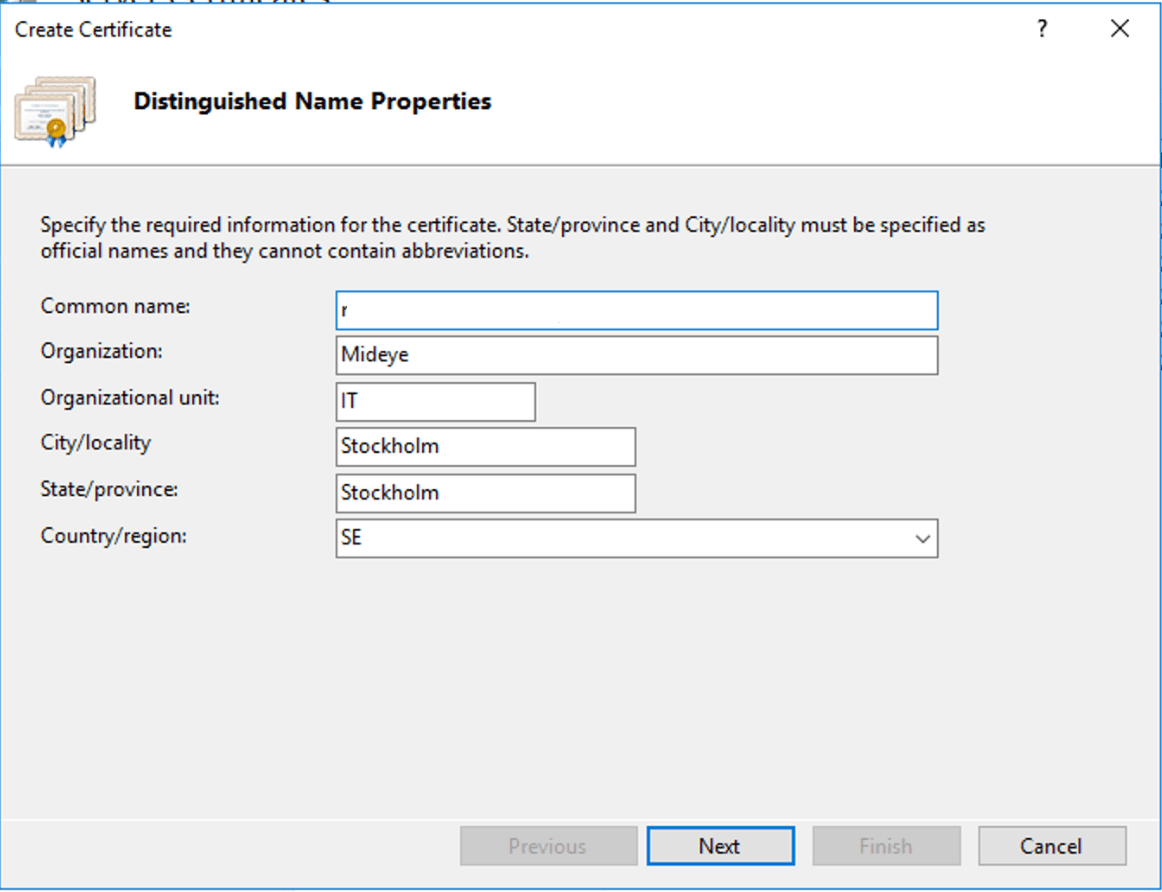
Common name: the FQDN of the URL that will be used to access the web admin.
Fill in the rest of the required fields and click Next.

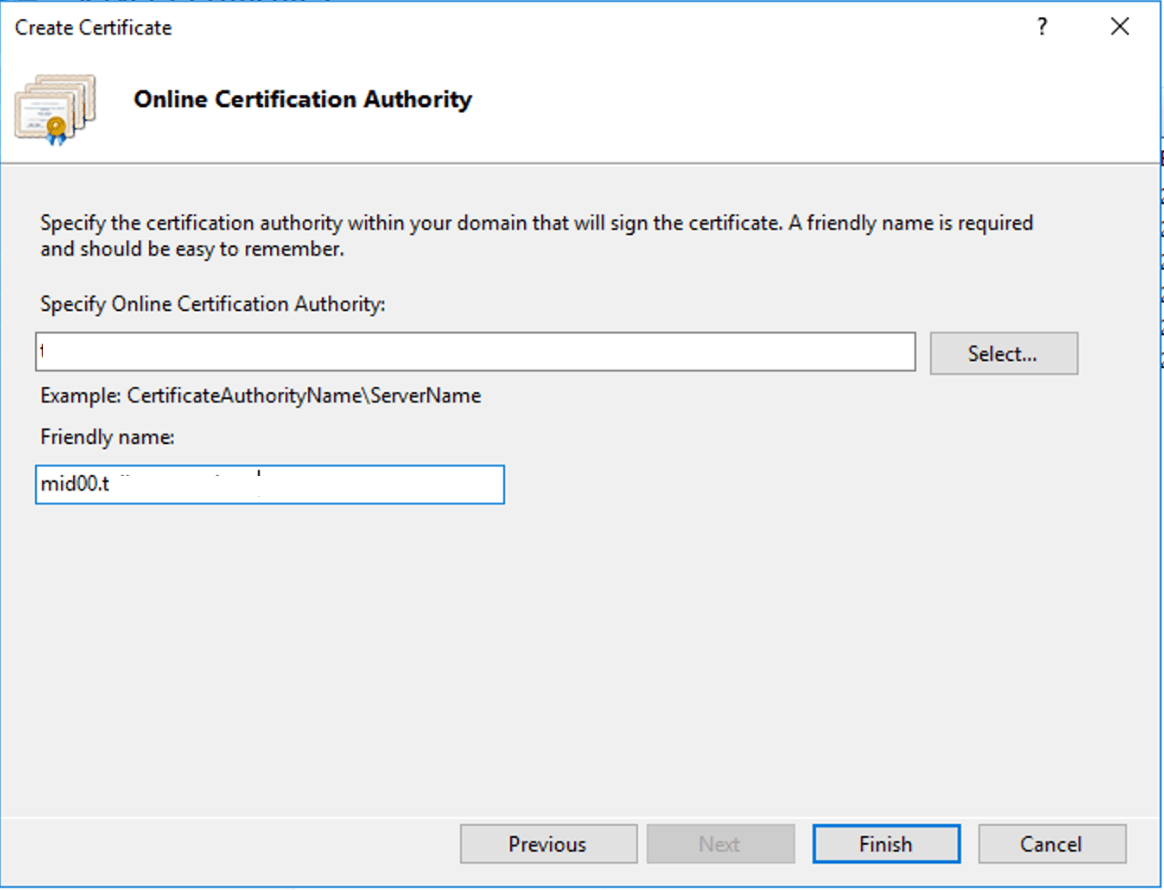
Select the CA and give the certificate a friendly name. Click Finish.

Right-click the created certificate and choose export. Save the certificate and set a password. This password will be re-entered in the server.xml file further down in the guide.
Copy the exported certificate to C:\Program Files (x86)\Mideye Server\certificates\filename.pfx
Before editing the server.xml file located in C:\Program Files (x86)\Mideye Server\webserver\conf\, make sure to take a backup.
Open server.xml as an administrator with a text editor.
At the end of the xml-file at the Connector port="8443", replace:
truststorePass="hN+JeFqq5hSsNaw" sslEnabledProtocols="TLSv1.2" keystoreFile="C:\Program Files (x86)\Mideye Server\certificates\webserver_https.keystore" truststoreFile="C:\Program Files (x86)\Mideye Server\certificates\webserver_https.keystore" keystorePass="hN+JeFqq5hSsNaw" maxThreads="150" useServerCipherSuitesOrder="true" clientAuth="false">
With
sslEnabledProtocols="TLSv1.2" keystoreFile="C:\Program Files (x86)\Mideye Server\certificates\FQDN.pfx" keystoreType="PKCS12" keystorePass="password" maxThreads="150" useServerCipherSuitesOrder="true" clientAuth="false">
The result should look something like:
<Connector port="8443" scheme="https" enableLookups="false" acceptCount="100" secure="true" minSpareThreads="25" maxSpareThreads="75" protocol="org.apache.coyote.http11.Http11Protocol" SSLEnabled="true" maxHttpHeaderSize="8192" disableUploadTimeout="true" ciphers="TLS_ECDHE_RSA_WITH_AES_256_GCM_SHA384,TLS_ECDHE_ECDSA_WITH_AES_256_GCM_SHA384,TLS_ECDH_RSA_WITH_AES_256_GCM_SHA384,TLS_ECDH_ECDSA_WITH_AES_256_GCM_SHA384,TLS_ECDHE_RSA_WITH_AES_128_GCM_SHA256,TLS_ECDHE_ECDSA_WITH_AES_128_GCM_SHA256,TLS_ECDH_RSA_WITH_AES_128_GCM_SHA256,TLS_ECDH_ECDSA_WITH_AES_128_GCM_SHA256,TLS_ECDHE_RSA_WITH_AES_256_CBC_SHA384,TLS_ECDHE_ECDSA_WITH_AES_256_CBC_SHA384,TLS_ECDHE_RSA_WITH_AES_256_CBC_SHA,TLS_ECDHE_ECDSA_WITH_AES_256_CBC_SHA,TLS_ECDH_RSA_WITH_AES_256_CBC_SHA384,TLS_ECDH_ECDSA_WITH_AES_256_CBC_SHA384,TLS_ECDH_RSA_WITH_AES_256_CBC_SHA,TLS_ECDH_ECDSA_WITH_AES_256_CBC_SHA,TLS_ECDHE_RSA_WITH_AES_128_CBC_SHA256,TLS_ECDHE_ECDSA_WITH_AES_128_CBC_SHA256,TLS_ECDHE_RSA_WITH_AES_128_CBC_SHA,TLS_ECDHE_ECDSA_WITH_AES_128_CBC_SHA,TLS_ECDH_RSA_WITH_AES_128_CBC_SHA256,TLS_ECDH_ECDSA_WITH_AES_128_CBC_SHA256,TLS_ECDH_RSA_WITH_AES_128_CBC_SHA,TLS_ECDH_ECDSA_WITH_AES_128_CBC_SHA" sslEnabledProtocols="TLSv1.2" keystoreFile="C:\Program Files (x86)\Mideye Server\certificates\name.pfx" keystoreType="PKCS12" keystorePass="password" maxThreads="150" useServerCipherSuitesOrder="true" clientAuth="false"></Connector>
- The service ‘Apache TomEE’ must be restarted for the changes to take effect.
Alternative 2: Use JKS / JCEKS format
- Take a backup and delete the self-signed certificate
\Mideye Server\certificates\webserver_https.keystore. - Name the new custom certificate ‘webserver_https.keystore’ and place it in the same directory as the old, deleted webserver_https.keystore
- In Mideye Server\webserver\conf\server.xml, find <Connector port=“8443” … > (at the end of the file) and modify the truststorePass and keystorePass with the password set for the new certificate.
The service ‘Apache TomEE’ must be restarted for the changes to take effect.
Optional: enable client certificate authentication
Per default, access to the Mideye Web Admin is protected with https using a self-signed certificate, generated during the installation. This certificate secures the communication between client and server.
In order to require client validation when accessing Mideye Web Admin, a client certificate needs to be generated and signed with the server certificate:
- Open the command prompt and cd to the Mideye Server installation directory
- Execute the command:
This will create a client certificate in:
It contains the client’s private key and certificate, signed by the server certificate.
The private key is protected by a random password generated during the creation of the certificate and displayed in the command prompt. After a restart of the “Apache TomEE” service, each browser that requests access to the Mideye Web Admin will need to import the client certificate.
Repeating the command generates a new client certificate, with a new password.
The service ‘Apache TomEE’ must be restarted for the changes to take effect.
Troubleshooting the Mideye Web Admin
If the Mideye Web Admin site can't be reached, make sure that the service TomEE is running, or try a service restart.
If the problem persists, open Mideye Configuration Tool -> Database Connection, click “Save” and “Close” and restart Mideye services. Refresh your browser and try login again.
Verify that the server is listening to the expected port (i.e. 8443). In Windows, the command is:
In Linux, the corresponding command is
If the server is not listening to the expected port after an upgrade of the Mideye Server, try to generate a new self-signed certificate.