Yubikey
Warning
Mideye Server 5 is no longer updated, and new installations are not supported. Only existing Mideye Server 5 installations and upgrades are supported. Please use Mideye Server 6 for new installations and continued support.
Starting from release 4.5.2 Mideye Server supports both YubiKeys provided by Mideye and YubiKeys obtained from third parties.
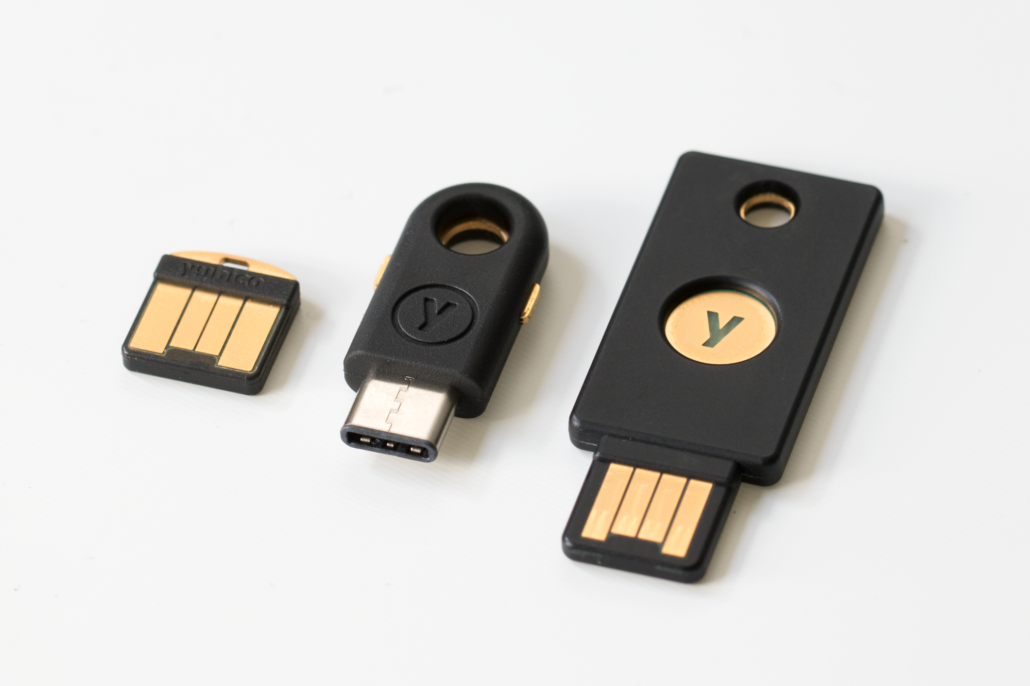
YubiKey 4 series. Weight 4 grams (YubiKey 4), excepted lifetime 18 years if used on a regular basis.
Yubikeys provided by Mideye
Mideye can dispatch YubiKeys to the customer’s IT department, or ship them directly to the end-user. These YubiKeys comes preconfigured and will authenticate directly against Mideye’s cloud service.
Complete the following steps to set up a token for an end-user:
- Obtain the serial number of the YubiKey: This serial number can be found on the back of the token. If the serial number is not visible, attach the YubiKey to a computer and open a text editor. Touch the button on the YubiKey and copy the first 12 characters, e.g **ubbc0643451**004116861. All tokens dispatched from Mideye will always start with ubbc0.
- Add the serial number to the user repository: By default, the Mideye Server will search for token numbers in the ipPhone attribute. Open ADUC and locate the user that should use the token. Open the properties of the user and navigate to the “Telephones” tab. Add the serial number in the IP Phone field.
- Change authentication method: The authentication method for the user must be changed to Tokens (if not already the default authentication type). Open Configuration Tool and navigate to “LDAP Servers”. Click “Modify” and select the “Authentication” tab. Check the “Read optional attributes” and add an LDAP attribute to the “Authentication type attribute”. In this example, the LDAP attribute “pager” will be used for the “Authentication type attribute”, but can be changed to any other attribute. The attribute chosen must be empty from other data.
- Set Token as authentication type: Once again, open ADUC and open the “Telephones” tab for the user. Add the number 3 to the pager field. See section Authentication types in the Reference guide to see what each number represents in the authentication list.
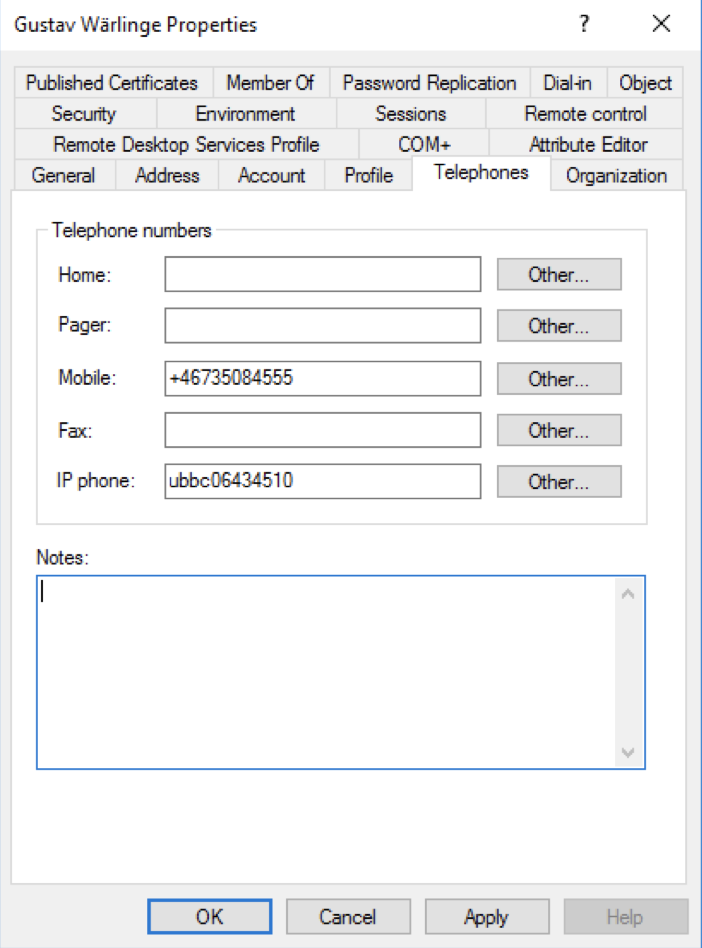
Add the serial number
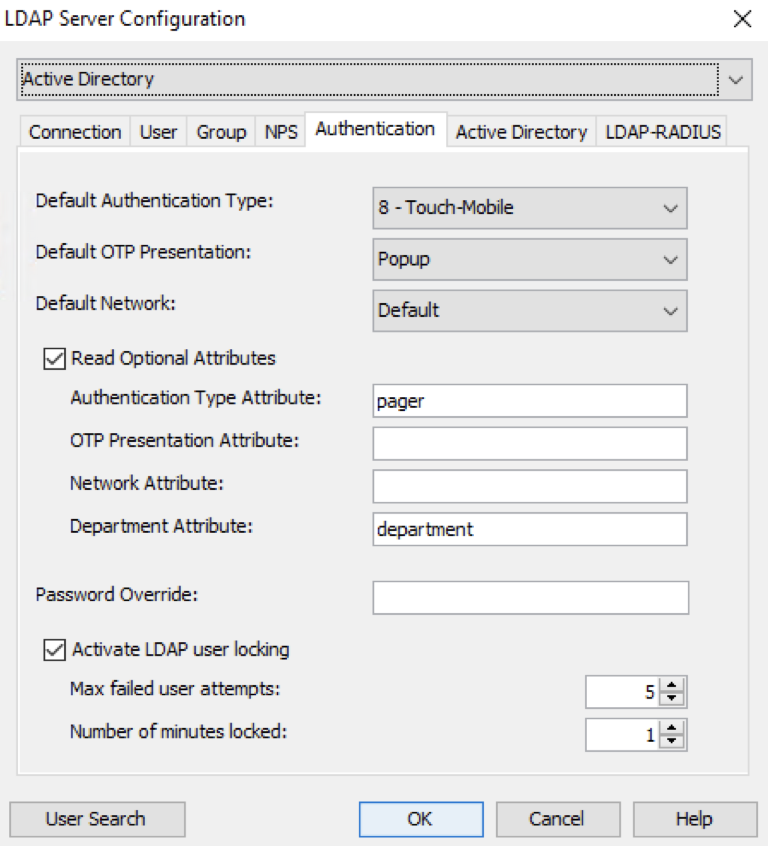
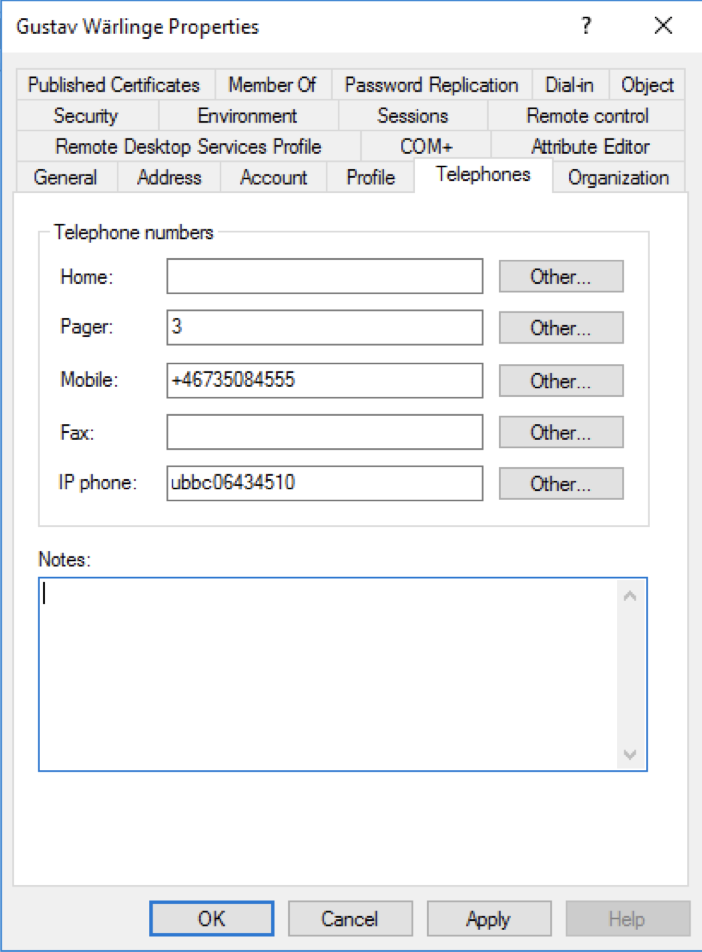
Add the number 3 to the pager field. 3 will represent token authentication.
Yubikeys obtained from third parties
Mideye server also supports YubiKeys that have been bought commercially. For example, a YubiKey that is being used for logging on to Facebook, or an end-users private computer, can also be used to login to the corporate network that is protected by Mideye.
Be advised that the authentication will be performed directly against Yubicloud, and Mideye can not control the availability of the service.**
Complete the following steps to set up a commercial YubiKey for an end-user:
- Obtain a YubiKey from a reseller. Yubico.com provides all the common YubiKeys. These can be bought here. All YubiKeys should be registered with YubiCloud by default. To verify, visit https://demo.yubico.com and authenticate using the YubiKey. This site also provides information such as YubiKey serial and Yubico provisioned credential identity. If authentication fails, visit https://upload.yubico.com to manually upload the key.
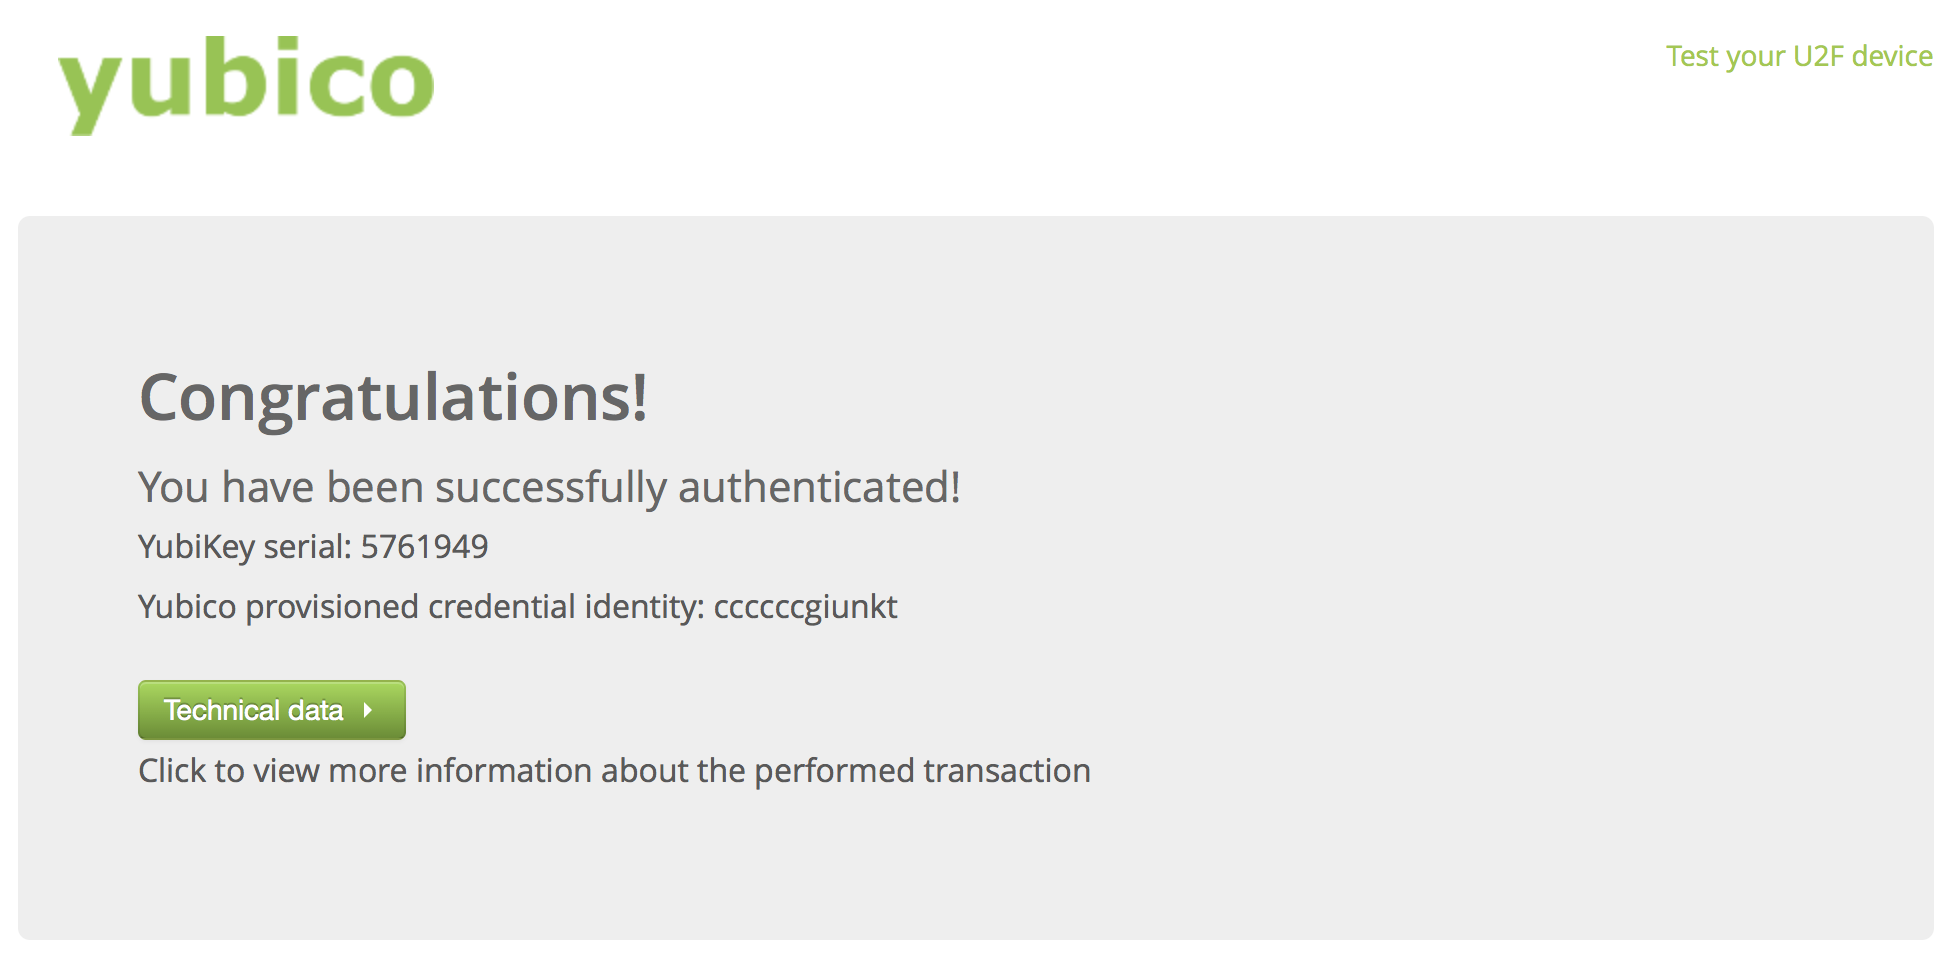
Yubico authentication test page.
- Obtain the serial number of the YubiKey: This serial number can be found on the back of the token. If the serial number is not visible, copy the YubiKey serial number from https://demo.yubico.com. Mideye requires the prefix zmub followed by the serial number, e.g zmub5761949
- Add the serial number to the user repository: By default, the Mideye Server will search for token numbers in the ipPhone attribute. Open ADUC and locate the user that should use the token. Open the properties of the user and navigate to the “Telephones” tab. Add the serial number in the IP Phone field.
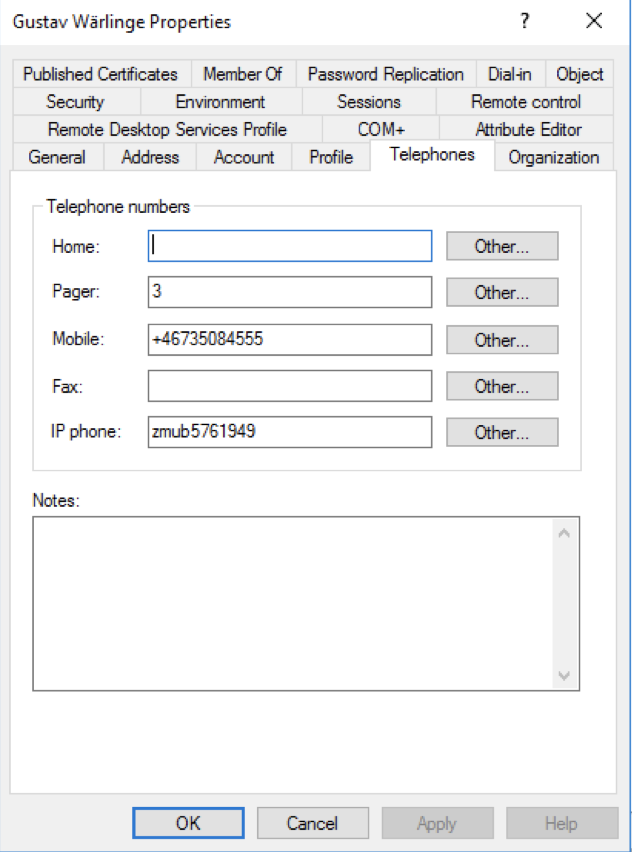
Add the serial number in the IP iPhone field - Change authentication method: The authentication method for the user must be changed to Tokens (if not already the default authentication type). Open Configuration Tool and navigate to “LDAP Servers”. Click “Modify” and select the “Authentication” tab. Check the “Read optional attributes” and add an LDAP attribute to the “Authentication type attribute”. In this example, the LDAP attribute “pager” will be used for the “Authentication type attribute”, but can be changed to any other attribute. The attribute chosen must be empty from other data. - Once again, open ADUC and open the “Telephones” tab for the user. Add the number 3 to the pager field. See section authentication in the configuration guide to see what each number represents in the authentication list.

Add the number 3 to the pager field. 3 will represent token authentication.